
The NativeScript extension for Visual Studio Code aids your NativeScript project development within Visual Studio Code.
To install NativeScript and all its dependencies, follow the instructions in our getting started guide.
Note: The VS Code extension uses the NativeScript CLI installed in your project (
node_modules/.bin/ns, also looked up in parent folders, e.g. a monorepo root) and falls back to a global installation. If you are using nvm with a global CLI, make sure thatnativescriptis installed in your default Node.js version (nvm lsshows it asdefault). To use a CLI somewhere else, set thenativescript.nsPathsetting to its path.
Create a NativeScript application by running ns create MyApp and open MyApp folder in Visual Studio Code. Open the Debug Panel, click the gear icon

and choose NativeScript debug environment.
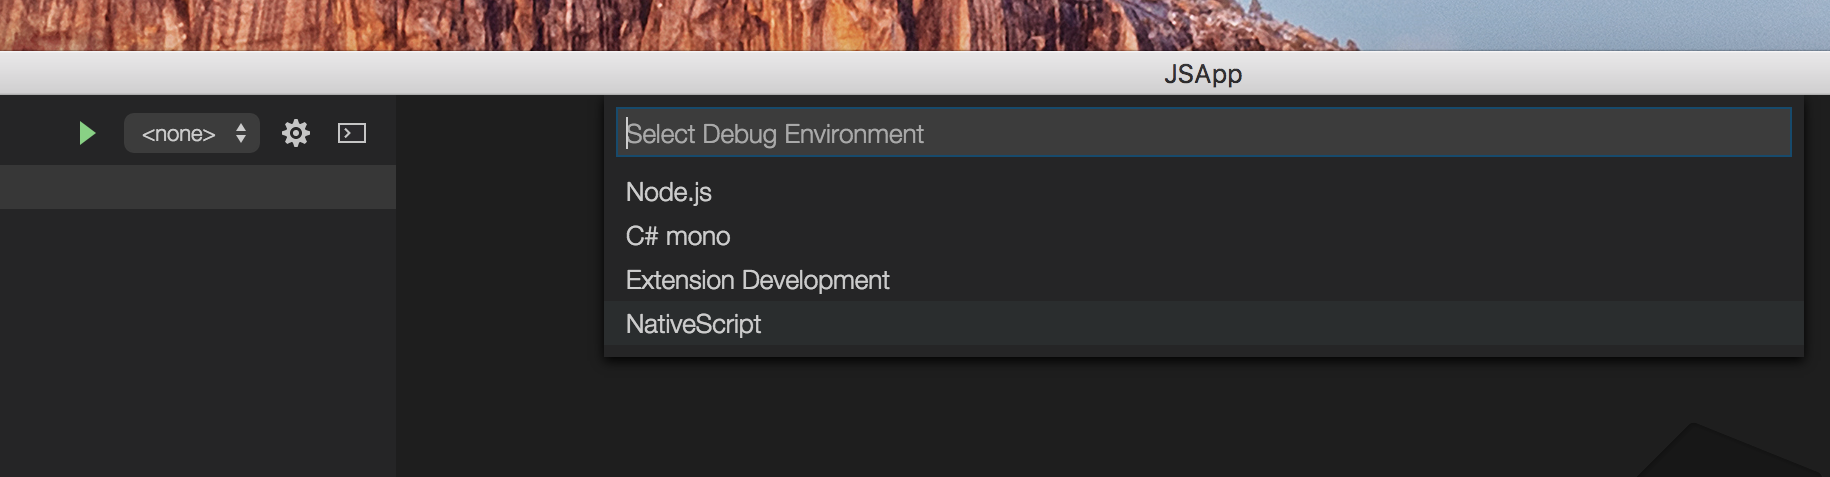
To start the application with attached debugger, choose one of the launch configurations from the drop-down list and then click the start button.
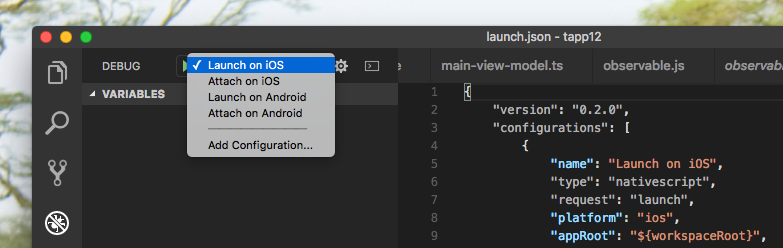
Your application will be launched and the VS Code JavaScript debugger will attach. With "watch": true, the debugger reattaches automatically every time the app restarts after a file change. If you want to attach to already running NativeScript application, use one of the attach configurations. More information on what you can do with the Visual Studio Code Debugger you can find here.
Besides the NativeScript-specific attributes (platform, appRoot, watch, tnsArgs, ...), launch configurations accept the common JavaScript debugger options sourceMapPathOverrides, resolveSourceMapLocations, skipFiles, smartStep and trace.
Source maps work whether they are inlined in the bundle or written as separate .map files: newer NativeScript runtimes serve map files from the device (nsruntime:// URLs), and for older runtimes the extension falls back to the copy of the build under platforms/.
If your project is started through another tool, set runtimeExecutable and runtimeArgs. The command runs exactly as written, in cwd (defaults to appRoot) with any extra env variables, and the debugger attaches when its output shows the CLI's debug port. The extension adds no flags of its own in this mode (watch, stopOnEntry, tnsArgs, Vite's --no-hmr, the iOS team), so put everything the command needs in runtimeArgs. For example, with Nx:
{
  "name": "Launch on iOS (Nx)",
  "type": "nativescript",
  "request": "launch",
  "platform": "ios",
  "appRoot": "${workspaceFolder}/apps/my-app",
  "cwd": "${workspaceFolder}",
  "runtimeExecutable": "npx",
  "runtimeArgs": ["nx", "debug", "my-app", "--platform=ios"],
  "watch": true
}
watch still matters here: it tells the extension to wait for the app to come back after a restart instead of ending the session.
Projects using the Vite bundler (bundler: 'vite' in nativescript.config.ts) are debugged with --no-hmr, because hot module replacement serves app code without source maps. File changes still rebuild and restart the app, and the debugger reattaches. Pass --hmr in tnsArgs to keep HMR on (breakpoints in app code won't bind). Debugging unit tests that use the Vitest runner is not supported yet.
Type NativeScript in the Command Palette and you will see all available commands.
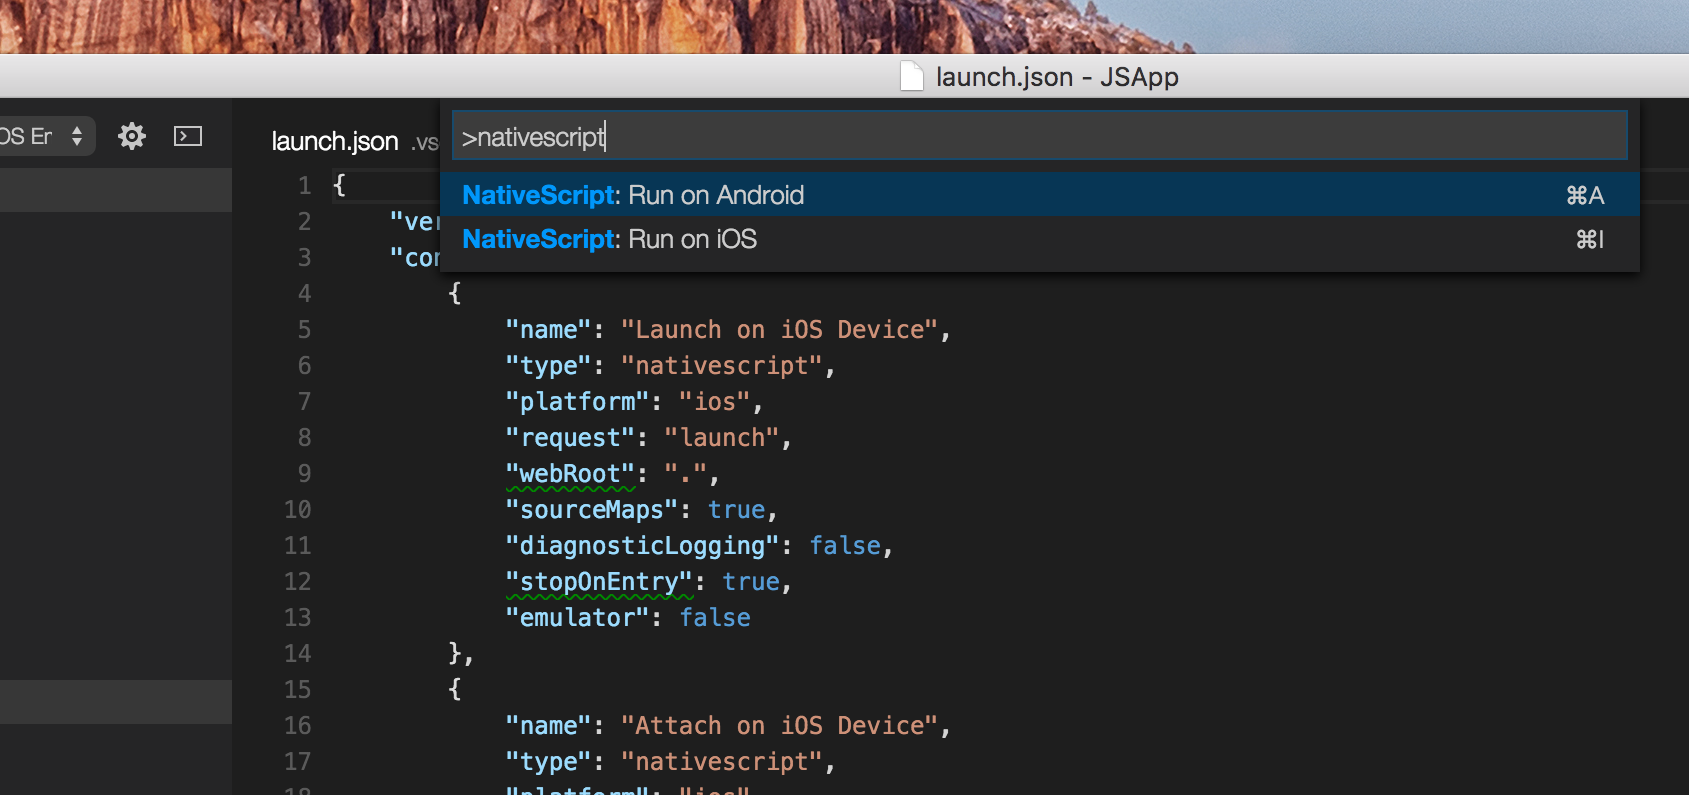
There's only a couple of them but the list will grow in the future.
The Run command triggers ns run on emulator or device. You can run your app both on iOS and Android.
If your version of NativeScript is incompatible with the extension you will see a warning the first time you run a command.
-
Clone the extension repository
git clone https://github.com/nativescript-community/nativescript-vscode-extension.git -
To build the extension run the following commands in the root repository folder:
npm install npm run build # compiles TypeScript source files to JavaScript npm run package # produces nativescript-*.*.*.vsix in the root folder -
To install the extension drag and drop the
nativescript-*.*.*.vsixpackage in the VS Code.
npm install
npm run lint        # ESLint
npm run typecheck   # TypeScript
npm test            # Vitest unit tests
Open the repository in VS Code and press F5 (Run Extension) to start an Extension Development Host with the extension loaded. Open a NativeScript app there and start one of its NativeScript launch configurations. After changing the extension's code, restart the Extension Development Host.
Releases are automated; see RELEASING.md. Release builds send analytics only when GA_MEASUREMENT_ID and GA_API_SECRET are set in the environment while packaging (vscode:prepublish writes them to out/ga-config.json). Never commit the API secret.
The anonymous usage data collected from the NativeScript extension for Visual Studio Code is used strictly to improve the extension. Nothing is sent unless you opted in, and nothing is sent while VS Code's own telemetry is turned off (telemetry.telemetryLevel).
If you have previously enabled the analytics option, you can disable it by following the steps outlined below:
- Open the Visual Studio Code Settings
- on Windows, select File > Preferences > Settings
- on macOS, select Code > Preferences > Settings
- Add the following option (or update the existing one) to disable the analytics:
"nativescript.analytics.enabled": false
Note: This option will disable only the analytics for the Visual Studio Code extension. To disable the analytics for the NativeScript CLI, open a command prompt or terminal and run the following commands:
ns usage-reporting disable
ns error-reporting disable